Showing posts with label Art. Show all posts

Wednesday, November 26, 2014

Wow and Happy Thanksgiving.

Um, hi, hello. I know we have been absent. I know we (mostly me) keep saying we'll post this or that and then silence for months. But people are visiting! Thank you. More than 100 people a day are here visiting our site and I am just so surprised! 
 I know Thanksgiving is tomorrow, so there is not a lot of time to create before the big day, but when your tummies are full or while waiting to eat, here are a few things we've done in my preschool class (follow me on Instagram if you like).
 It all started with the mayflower. This one is quick and requires little, plus there is the fun memento of your kiddo's little hand forever printed on the page. We just used half a sheet of light blue construction paper, had the kids draw on white clouds and blue water (or whatever they wanted, which DID include Elsa!) Then paint one hand brown and plop it on the paper for your boast and masts. Then glue on little white squares for sails. I think I originally saw this in Family Fun magazine. I will go back and check.
 The turkey gets a lot of play this time of year, however I am pretty certain he never looks like this when I'm about to chow at Thanksgiving dinner. Another simple project. Cut a cheap paper plate in half, glue a peanut  shaped (or whatever shape you want your turkey body to be) piece of brown paper to it. If you just draw the shape, the little ones can cut it our themselves. Draw in features (or use other materials - orange paper for a beak, googly eyes, even yarn for that red thing by their beaks). the next part can be done with construction paper, but I think it looks best with tissue paper. Voila! Turkey!
 We talked in class about how the Wampanoag Indians helped the pilgrims and taught them about corn. The kids explored the kernels, removed them from the cob, and we also compared field corn to popcorn. Then I air popped a batch of popcorn. 
I was able to use Indian Corn last year which added in a fun dimension and I even popped it in the microwave to show that even corn on the cob can pop!
We used both the popped corn and the field corn kernels (popcorn kernels would clearly work too) to create out own harvested corn. I just eyeballed the shapes for the cob and the husks and let them glue everything on however they thought it best.
 This one is pretty standard this time of year. You can add on some feet, a beak, eyes and all that fun stuff to make it even more fancy.
 I'll have to look up where I got this idea too, but it is a turkey handshake. First we just started with making it on our own hands before trying to make one with a friend. The open hand is the feathers and the "thumbs up" on its side is the body and head. the kids like this a lot.
 I always love a little bit on Montessori style work in my classroom. This is not just a simple transferring activity. It also can be an introduction to how cranberries are harvested and show that they float (maybe a little sink or float question before filling the bowl up?). There are 3 different utensils I put out for them to transfer with - all bought at the thrift store. The spoon is slotted so the water doesn't really transfer along.
This can also just be done with a bowl and any sort of sectioned off container, like an ice cube tray, using the fingers to transfer. This is also good as a sensory activity.
The last one I have for today is this story telling bracelet and poem from Dr. Jean. It's a good way for the kids to have a visual way to remember how the first Thanksgiving came to be.
Have a wonderful Thanksgiving and thank you so much for visiting our blog.

Wednesday, July 10, 2013

Summer Painting

 Here are two simple "painting" activities for your kiddos to do this summer.
The first is seriously too easy. Grab a bucket, cup, bowl, whatever of water and a paint brush.
No mess and the fun goes on.
Another simple way to let your kids paint the sidewalk is with sidewalk paint.
 You may have seen this idea and not known how super uncomplicated it is. The link I originally used is gone now, but the mix is an easy 50-50 mix of water and corn starch and add whatever food coloring you like. Stir, stir. 
 Once again. hand over a paintbrush (like paint the house style, not water color variety) and let them go at it.

Wednesday, March 20, 2013

Spring Flowers

It's officially spring. As I'm sitting here it is a gloomy day with sprinkles. In some ways, a perfect representation of spring. It's not my favorite season, but I do love how variant it is. Pretty much anything goes for spring - hot, cold, snow, rain, windy, cloudy. . . you get what I'm saying. We had a LOT of snow this winter and as it melted away, I was amazed to see that despite all the heavy white stuff on them. my daffodils and tulips had pushed through the ground. I imagine it won't be too much longer before the buds appear.
Leaves returning, blossoms on the trees and flowers all around are some of my favorite parts of spring. So, as I was sitting down with with my son, working out of Ed Emberley's Picture Pie book at his request, I decided I must make flowers.
The book is full of many ideas, but you can easily use your own creativity. I keep a bin of colorful paper scraps - left over scrapbook paper, the fronts of thank you, birthday, etc. cards, and so on. It is very handy for a project like this. When we got he book I went out and purchased a circle punch. I want to say it is an inch or maybe 1.25 inches. 
 It needs to be enough that you can cut the circles in to eighths and have the pieces still big enough to work with. Of course, you can always just cut the circles out with scissors. 
 One thing I like that this has taught my 6 year old a few fractions. All the ideas in the book use these 4 shapes. For the spring flowers, we'll just use the 1/8 piece.
 First I filled the bottom of the paper with various greens for some grass. I found it easiest to just put short lines of glue on the background paper instead of each individual triangle.
 Then I randomly put green triangles scattered around the rest of the page. For the petals you can do 3 or 4. I think they look better a little tucked under the green, but clearly you can do it however you like.
 Lastly, add some stems.
This picture makes me happy.
And if you aren't into flowers, there are certainly other options.
 My son started with a bird and a fish. 
 Then he did a pair of these along with another fish.
The options are endless.
Get yourself cutting and gluing!

Saturday, December 22, 2012

Festive Fridge

 Yes, Christmas is only a few days away. It may feels like a short time for you, but for a kid those are a LONG few days. It was with this in mind that made me go ahead and do a few Christmas projects I'd figured we had run out of time for.
from I Can Teach My Child
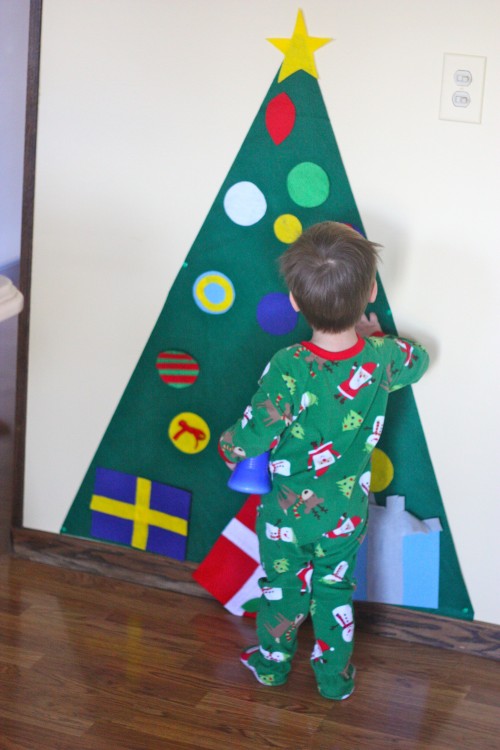
I've been wanting to make Christmas tree advent calendar for a few years. I loved the one we had while I was growing up. Every year December 1st comes along so quickly that I haven't gotten to it yet. So, when I saw this idea I thought that it was a perfect temporary version of the tree. BUT, I'd have to go buy a big piece of flannel and another errand was not something I wanted to add to my endless "to do" list. I had a few other solutions running through my mind when I saw this magnet idea on Young House Love and my ideas all came together as a real project.
 I just happened to have some small plastic ornaments that I bought last year. I used about half to fancy up the wreath on my door and used what was left over. Add in some magnets and strong glue and you are ready for half of the project. This could be the end of the project too if you liked.
 My son and I glued the magnets on the ornaments and set them in an egg carton to dry. (The few that had glitter on the surface have not held together as well as the plain ones.)
 
 Once dried they found a new home on the fridge.
 Like I said above, the project could end here because not only are they festive on the fridge alone, but are fun for kids to arrange and re-arrange. But, I took it a step further.
 Awhile back I had seen an idea for painting contact paper and using it as temporary decals on the wall. I don't remember what the original link was, but used this one from 31 DYI. When the tempera paint I used above dried all flaky, I referenced the website and saw that she used acrylic paint. So, ignore the tempera above and replace it with regular craft paint. Also, I had both clear and white contact paper. Either would work, but I chose the white since I think I have more other uses for the clear.
 Anyway, sketch out a triangle for your tree (measure your space first) or just eyeball it and begin to paint.
 Enlist a small helped to make creating the project a kid thing too, not just the final product. (I admit, I did go back over her painting to make the brushstrokes look more pine tree-like.)
 Once the paint is dry, just cut out your tree and carefully pull of the backing on the contact paper. I started at the top and pressed it down on the fridge as I went.
Add the ornaments and it's time to play!
I have 2 other Christmas projects we did this past week, but I'm not sure If I will have time to post before Christmas, so I may post them after Christmas or just hold on to them until next year. Any preferences?

Thursday, August 30, 2012

Sharpie Tie Dye


The website I got my instructions from is here. When I was growing up we used to make tie dye shirts a lot. I loved it. It was messy, but fun to feel like you created your own shirt and it was awesome to see how each turned out differently. When I saw this idea of making a tie dye shirt using sharpie markers, I thought it was super awesome and wanted to try it with my girls.
 
Supplies :
-Sharpie or permanent Bic markers
-Rubber bands
-Rubbing Alcohol
-Eyedropper
-Plastic cup
-Pre-washed white shirt
-a piece of cardboard
 Before I started I sort of thought out where it might look good to have the circles of tie dye. I saw some ideas that had the entire shirt covered in tie dye circles and then they put an iron one decal over the top, which was cute too. I had never done this before so I just sort of guessed at how I wanted to do this. I put a piece of cardboard on the inside of the shirt so our color wouldn't leak to the back of the shirt, then I put a plastic cup (mine was a little big, but worked fine) inside the shirt and placed it where I wanted to start our first tie dye coloring spot and pulled the shirt tight over the cup and placed a rubber band around the cup. A very helpful hint I read about said not to use any complimentary colors together in the same circle or the colors would bleed and make the color turn to brown. This took some thinking to coordinate my colors and remember what complimentary colors were. So here are the colors you DON'T want together in the same circle: red and green, orange and blue, yellow and purple. It also said to only color in the center of the circle of the cup space and not on the edges of the inside of the circle. One of my daughter drew full on pictures and did lots of coloring in and the colors got muddy looking because there was too much coloring. My other daughter drew designs and less lines and less coloring in and hers turned out better, I thought. After they were done coloring a spot, I would use the dropper to put 10+ drops of rubbing alcohol (it said you might have to have 91% rubbing alcohol but mine was way lower % than that and it worked just fine) onto the coloring. You can watch the colors spread and change. I used as many drops as I needed to make sure that the colors were blending. Once it was done spreading (a minute or two). I would move the cup to our next spot and do that process all over again.
I did leave one cup under part of our finished shirt just so the color wouldn't bleed to the back, even though we had the cardboard in between.
 Here are the finished shirts. The one on the right is the one I thought turned out better with less coloring and more just designs. I didn't tell them what to draw, they just did whatever they felt like. They were sad when we were finished because they wanted to do more and were having fun with it. I had wished that I had bought more plain white shirts because they would have totally made another one if I had one. After we were done I put the shirts in the dryer to set the colors.
 The only part of this that I considered a miserable failure was the fact that the shirts I bought were TOTALLY the wrong size. I bought size 4-6 and should have realized they looked too big. Apparently there were some woman's 4-6 sized shirts sitting with the kids 4-6 shirts at Wal-mart???? :(  I was sad because they really was just way too big to wear right now. Oh well, it was still a fun project.