Showing posts with label Winter. Show all posts

Friday, December 6, 2013

Paper Strip Tree

 This post is a project we did last year around Christmas time. It's great for any age. My kids ranged between 2.5 and almost 7.
 When I saw this idea on Whatever... I thought it would be a great way to use a lot of Christmas scrap paper I had left over from another project.
Supplies - lots of patterned green paper, scissors, glue stick, and if you want to save some time, a paper cutter.
I cut out the paper in various widths. I cut those strips into various lengths (something a child could also very easily do). Once we had a pile ready to go, I let everyone chose a background paper.
From there is is just gluing. It might be helpful to lay out the tree before gluing, but winging it is sometimes more fun. Either way will obviously work.
It's meant to go from longest strip at the bottom to shortest strip at the top to look like an evergreen.
We are not picky about that and figure the kiddos should just do what they can. Just gluing down the strips is good work for those cute little hands.
And my little artist had a tree set up to glue, but changed his mind and decided to make his into a shark instead. The point is to create and that he did!
The three individual creations side by side.
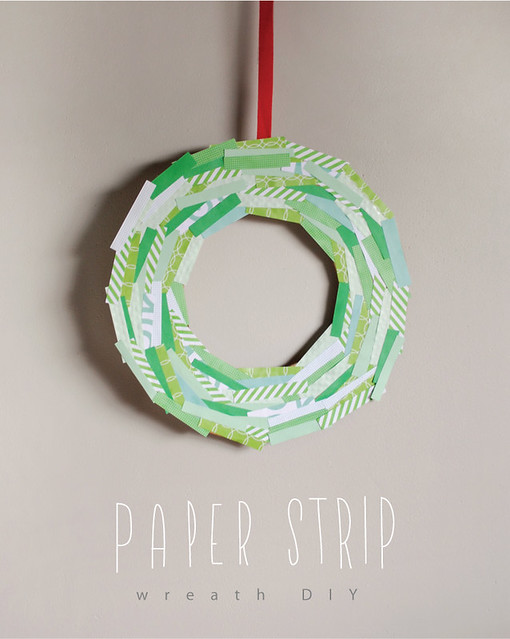
I still have papers left over, so maybe this year we will make a wreath like this one featured on Mer Mag. 

Thursday, December 13, 2012

Beaded Candy Canes

As promised - a Christmas craft! This is far from a new or original idea, but it is still one I was very excited to do with my kids.
This was 1983. Our family Christmas tree for many years was full of homemade decorations. Along with painted ceramics, cross-stitches of wreathes and candles, and reindeer made out of old school clothes pins stained brown were these simple candy canes made from beads and pipe cleaners.
My hope was to make them last year, but I must have waited too long in the holiday season because the craft store was all out of the right beads. They are these funny looking ones as picture above. They likely have a fancy name.
Afraid I would not have good luck at the store again this year, I went ahead and order kits from Oriental Trading. I would suggest this only if you can't find what you need.
Otherwise, head to the craft store and pick up a package of pipe cleaners (red or white) and two packages of beads - one red, one white.
Each candy cane will need 25 beads of each color, so 50 per ornament.
The  way I made mine is to put on 2 beads of one color, then two of the next. leave about a half an inch or so between the fist bead and the end of the pipe cleaner. To speed things up I put on 4-6 and then slid them down to meet the beads at the bottom. My boys preferred to put on one at a time sliding each the entire length. I tink this si why they burned out after making 2. That's okay though. :)
Once all 50 beads are on, fold the ends in towards the beads so they won't fall off. You may have to trim the pipe cleaner down a bit. Then just bend into a crook at one end and you're done!

Wednesday, December 5, 2012

Candy Cane Marshmallow Dipper


 We were trying to think of an easy and fairly quick treat to make together the other night. I had seen this idea here for making these candy cane "pops", as they called them, to use with hot chocolate and thought it would be perfect. My kids and I are big fans of hot chocolate. 
Supplies:
-Large marshmallows
-Small candy canes
-Wax paper
-Hot chocolate of your choice
-Rolling Pin
-Chocolate for melting (I used these chocolate chips, but in the future I would use normal candy making melting chocolates)
 
As I frequently mention, I like to see what fine motor skills practice we can get in during our projects and this time I was surprised to note how hard it was for my girls to get the candy canes out of the little packages without breaking them. 
 
We opted to use scissors to open them (which is still fine motor practice, I guess). :) So we unwrapped a  bunch of little candy canes.
 We used a rolling pin to crush a bunch of still wrapped other candy canes.
 We then stuck the long end of the candy cane into a big marshmallow. They liked this step. I was surprised that even my 2 year old could do this step well.
 
We laid out wax paper, put our crushed candy cane bits on a plate and melted our bowl of chocolate chips. I made sure our center was all ready to go before we melted the chocolate because I know how fast that melted chocolate will harden.
 Like I said before, I wouldn't use chocolate chips again. I think I over heated the chocolate because it wasn't smooth after I heated it. Ours got kind of clumpy so we couldn't just dip the marshmallow. We had to sort of "paint" or spread the chocolate on. It was fine because they still thought it was fun.
 Immediately after they spread the chocolate they  rolled the chocolate covered marshmallow into the crushed candy cane bits.
 Ta-da! I thought they turned out pretty cute, even if our chocolate was a little weird.
 The kids loved them and dipped them in their hot chocolate then would eat part of it and then dip it again. I opted to dump my whole thing into the mug and let it melt to add some yummy flavor to my hot chocolate. We put the rest that we made into a baggie and froze them until all the way cooled and hardened and have them ready to use for our next hot chocolate drinks. It was a hit and I would definitely make them again. They would also make really cute neighbor or teacher gifts.

Thursday, March 8, 2012

Coffee Filter Snowflakes

Our hopes for spring time were dashed by a blasting snowstorm the other day.  
The kids and I decided to embrace this wintery-ness with a little snowflake craft. 

And for those that are trying to help their children improve their skills with scissors - this is a great craft.  
My daughter just kept making them all day long.

Supplies:
Coffee Filters
Scissors

Fold one filter in half - then in thirds and finally in half...
Then start snippin' away.  

And create fun easy snowflakes while honing your scissors skills.


saw this idea here

Monday, January 23, 2012

Lanterns & Dragons

Today is Chinese New Year (aka Spring Festival) and marks the start of the Year of the Dragon. It is also the biggest holiday in China. There are a lot of fun traditions and festivals leading up to this day each year and I only read about them, so I'm not going to pretend to be any kind of expert. Some of the things that they do are have a lantern festival and watch parades with people dressed as dragons and lions.
Before we started our two projects, I read my boys the book "Lanterns and Firecrackers." It was a simple run down of what goes on during the Chinese New Year.
We also got "Moonbeams, Dumplings & Dragon Boats" to read later today, as suggested by Let's Explore (who has some great monthly book lists).
Both projects are simple and require few supplies.  Construction paper, scissors, glue, a stapler, and paper plates should do the trick.
 To make the lanterns, fold the paper lengthwise, from the folded side make cuts about 1.5 to 2 inches (or really, whatever distance you like) without cutting all the way to the edge of the paper. Unfold it and roll it up like pictures and secure with a couple of staples.
Red is a more traditional color to use, but my boys wanted different colors, so we made a whole rainbow of them.
You can add handles to the lanterns by cutting a strip of paper and stapling it on two sides of the lantern. We use the short end of the construction paper, but any length is fine.
 Our next project was to make some dragon masks. If you look at pictures of Chinese dragon masks you will see that they are very colorful and there is a lot of variety. My boys like being able to just make it up as they went without feeling like they had to have it a certain way (though they did seem to copy elements of mine).
 We used the bottom side of the paper plates so that that masks would curve towards our faces. My younger son wanted his to have eye holes, so we cut those out before gluing on the paper so he could see. From here it is a free for all. I ripped all my pieces for a different sort of texture. My older son cut his with scissors. My younger son wanted stripes. As you can see, there are so many ways to make the masks. You could even just paint or color the masks with crayons.
Ta-da! It took awhile for the glue to dry. At their request after I was done taking pictures, I added popsicle stick to the bottom so they could hold them that way. 
 Enjoying making these projects and using it as a time to teach your kids about customs that people have in other countries. And to top it all off, have Chinese food tonight!