Showing posts with label Craft. Show all posts

Wednesday, November 26, 2014

Wow and Happy Thanksgiving.

Um, hi, hello. I know we have been absent. I know we (mostly me) keep saying we'll post this or that and then silence for months. But people are visiting! Thank you. More than 100 people a day are here visiting our site and I am just so surprised! 
 I know Thanksgiving is tomorrow, so there is not a lot of time to create before the big day, but when your tummies are full or while waiting to eat, here are a few things we've done in my preschool class (follow me on Instagram if you like).
 It all started with the mayflower. This one is quick and requires little, plus there is the fun memento of your kiddo's little hand forever printed on the page. We just used half a sheet of light blue construction paper, had the kids draw on white clouds and blue water (or whatever they wanted, which DID include Elsa!) Then paint one hand brown and plop it on the paper for your boast and masts. Then glue on little white squares for sails. I think I originally saw this in Family Fun magazine. I will go back and check.
 The turkey gets a lot of play this time of year, however I am pretty certain he never looks like this when I'm about to chow at Thanksgiving dinner. Another simple project. Cut a cheap paper plate in half, glue a peanut  shaped (or whatever shape you want your turkey body to be) piece of brown paper to it. If you just draw the shape, the little ones can cut it our themselves. Draw in features (or use other materials - orange paper for a beak, googly eyes, even yarn for that red thing by their beaks). the next part can be done with construction paper, but I think it looks best with tissue paper. Voila! Turkey!
 We talked in class about how the Wampanoag Indians helped the pilgrims and taught them about corn. The kids explored the kernels, removed them from the cob, and we also compared field corn to popcorn. Then I air popped a batch of popcorn. 
I was able to use Indian Corn last year which added in a fun dimension and I even popped it in the microwave to show that even corn on the cob can pop!
We used both the popped corn and the field corn kernels (popcorn kernels would clearly work too) to create out own harvested corn. I just eyeballed the shapes for the cob and the husks and let them glue everything on however they thought it best.
 This one is pretty standard this time of year. You can add on some feet, a beak, eyes and all that fun stuff to make it even more fancy.
 I'll have to look up where I got this idea too, but it is a turkey handshake. First we just started with making it on our own hands before trying to make one with a friend. The open hand is the feathers and the "thumbs up" on its side is the body and head. the kids like this a lot.
 I always love a little bit on Montessori style work in my classroom. This is not just a simple transferring activity. It also can be an introduction to how cranberries are harvested and show that they float (maybe a little sink or float question before filling the bowl up?). There are 3 different utensils I put out for them to transfer with - all bought at the thrift store. The spoon is slotted so the water doesn't really transfer along.
This can also just be done with a bowl and any sort of sectioned off container, like an ice cube tray, using the fingers to transfer. This is also good as a sensory activity.
The last one I have for today is this story telling bracelet and poem from Dr. Jean. It's a good way for the kids to have a visual way to remember how the first Thanksgiving came to be.
Have a wonderful Thanksgiving and thank you so much for visiting our blog.

Friday, December 6, 2013

Paper Strip Tree

 This post is a project we did last year around Christmas time. It's great for any age. My kids ranged between 2.5 and almost 7.
 When I saw this idea on Whatever... I thought it would be a great way to use a lot of Christmas scrap paper I had left over from another project.
Supplies - lots of patterned green paper, scissors, glue stick, and if you want to save some time, a paper cutter.
I cut out the paper in various widths. I cut those strips into various lengths (something a child could also very easily do). Once we had a pile ready to go, I let everyone chose a background paper.
From there is is just gluing. It might be helpful to lay out the tree before gluing, but winging it is sometimes more fun. Either way will obviously work.
It's meant to go from longest strip at the bottom to shortest strip at the top to look like an evergreen.
We are not picky about that and figure the kiddos should just do what they can. Just gluing down the strips is good work for those cute little hands.
And my little artist had a tree set up to glue, but changed his mind and decided to make his into a shark instead. The point is to create and that he did!
The three individual creations side by side.
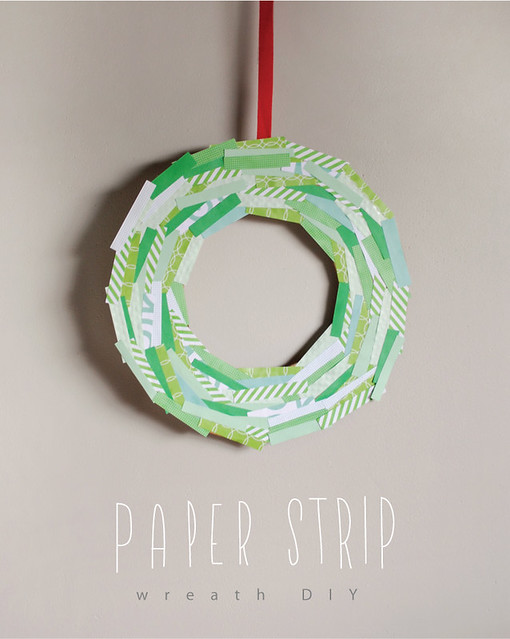
I still have papers left over, so maybe this year we will make a wreath like this one featured on Mer Mag. 

Thursday, December 13, 2012

Beaded Candy Canes

As promised - a Christmas craft! This is far from a new or original idea, but it is still one I was very excited to do with my kids.
This was 1983. Our family Christmas tree for many years was full of homemade decorations. Along with painted ceramics, cross-stitches of wreathes and candles, and reindeer made out of old school clothes pins stained brown were these simple candy canes made from beads and pipe cleaners.
My hope was to make them last year, but I must have waited too long in the holiday season because the craft store was all out of the right beads. They are these funny looking ones as picture above. They likely have a fancy name.
Afraid I would not have good luck at the store again this year, I went ahead and order kits from Oriental Trading. I would suggest this only if you can't find what you need.
Otherwise, head to the craft store and pick up a package of pipe cleaners (red or white) and two packages of beads - one red, one white.
Each candy cane will need 25 beads of each color, so 50 per ornament.
The  way I made mine is to put on 2 beads of one color, then two of the next. leave about a half an inch or so between the fist bead and the end of the pipe cleaner. To speed things up I put on 4-6 and then slid them down to meet the beads at the bottom. My boys preferred to put on one at a time sliding each the entire length. I tink this si why they burned out after making 2. That's okay though. :)
Once all 50 beads are on, fold the ends in towards the beads so they won't fall off. You may have to trim the pipe cleaner down a bit. Then just bend into a crook at one end and you're done!

Sunday, December 9, 2012

Batik T-shirts

You might be in Christmas craft mode and this is not one of those, so my apologies. I'm in catch up on old projects we have done and I have never posted mode. I do have a rather generic Christmas project post I will try to get up later in the week. (I am really selling this to you, aren't I?!)
Anyway, this idea is one I had listed as one of my 100 Summer ideas and we finally got around to it this fall. I used the instructions from That Artist Woman. I decided it would be more fun to make something the kids could wear than a pillow, so we used cotton t-shirts.
Each boy used a washable fabric pen to draw a picture on their shirt. You can actually skip this step and jump to the next one, especially with older kids.
I traced over the disappearing ink with gel glue (and ours was a bit old, so it didn't flow well, so make sure yours is fresh for better results). I'd suggest for both this part and the painting that you have some sort of barrier between the two layers of shirt. We used cardboard, but wax paper and freezer paper would work well too.
My 5.5 year old was having a hard time drawing on the shirt, so he just drew a picture on paper. I then scanned it in and enlarged it. Then I put it between the shirt layers and just traced it with the glue.
Once you have your pictures or designs drawn on, let the glue fully dry.
Next up - the messy part! I told my boys that these were going to be pajamas shirts, so I didn't care how ugly creatively they painted them. They went to town! Make sure you fully paint over your glue spots so that your design will show up well. (We use regular craft paints. It makes the painted area a bit stiffer than fabric paint, but because they were just pajamas, that wasn't important to me. You can definitely use fabric paint, or else craft paint with a little bit of fabric medium added in.
Let the paint fully dry.
Put your shirt/fabric in warm water to rinse off the glue. You will probably have to swish it around a bit. The glue will soften and will just sort of come off. There may be some spots you have to help remove some by pulling it off.
Admire your design/handiwork when it is all dry!

Thursday, August 30, 2012

Sharpie Tie Dye


The website I got my instructions from is here. When I was growing up we used to make tie dye shirts a lot. I loved it. It was messy, but fun to feel like you created your own shirt and it was awesome to see how each turned out differently. When I saw this idea of making a tie dye shirt using sharpie markers, I thought it was super awesome and wanted to try it with my girls.
 
Supplies :
-Sharpie or permanent Bic markers
-Rubber bands
-Rubbing Alcohol
-Eyedropper
-Plastic cup
-Pre-washed white shirt
-a piece of cardboard
 Before I started I sort of thought out where it might look good to have the circles of tie dye. I saw some ideas that had the entire shirt covered in tie dye circles and then they put an iron one decal over the top, which was cute too. I had never done this before so I just sort of guessed at how I wanted to do this. I put a piece of cardboard on the inside of the shirt so our color wouldn't leak to the back of the shirt, then I put a plastic cup (mine was a little big, but worked fine) inside the shirt and placed it where I wanted to start our first tie dye coloring spot and pulled the shirt tight over the cup and placed a rubber band around the cup. A very helpful hint I read about said not to use any complimentary colors together in the same circle or the colors would bleed and make the color turn to brown. This took some thinking to coordinate my colors and remember what complimentary colors were. So here are the colors you DON'T want together in the same circle: red and green, orange and blue, yellow and purple. It also said to only color in the center of the circle of the cup space and not on the edges of the inside of the circle. One of my daughter drew full on pictures and did lots of coloring in and the colors got muddy looking because there was too much coloring. My other daughter drew designs and less lines and less coloring in and hers turned out better, I thought. After they were done coloring a spot, I would use the dropper to put 10+ drops of rubbing alcohol (it said you might have to have 91% rubbing alcohol but mine was way lower % than that and it worked just fine) onto the coloring. You can watch the colors spread and change. I used as many drops as I needed to make sure that the colors were blending. Once it was done spreading (a minute or two). I would move the cup to our next spot and do that process all over again.
I did leave one cup under part of our finished shirt just so the color wouldn't bleed to the back, even though we had the cardboard in between.
 Here are the finished shirts. The one on the right is the one I thought turned out better with less coloring and more just designs. I didn't tell them what to draw, they just did whatever they felt like. They were sad when we were finished because they wanted to do more and were having fun with it. I had wished that I had bought more plain white shirts because they would have totally made another one if I had one. After we were done I put the shirts in the dryer to set the colors.
 The only part of this that I considered a miserable failure was the fact that the shirts I bought were TOTALLY the wrong size. I bought size 4-6 and should have realized they looked too big. Apparently there were some woman's 4-6 sized shirts sitting with the kids 4-6 shirts at Wal-mart???? :(  I was sad because they really was just way too big to wear right now. Oh well, it was still a fun project.

Sunday, July 1, 2012

Fine Motor Skills Activities: Part 8


To repeat what I said during "Fine Motor Skills Activites: Part 1":
"I have been busy lately doing activities with my kids that are more learning-type activities and not as blog friendly as kids crafts. I wanted to do a series of post about fine motor skills though because that is something we have been focusing on at my house. My daughter started kindergarten this (last) year and I spent so much time before kindergarten making sure that she knew her letters, sounds, shapes, colors, starting basic reading and site words, etc that in retrospect I didn't probably spend as much time on fine motor activities like writing her name and scissors as I should have. She is a little behind in those categories so I searched the internet for a variety of activities I could do with her that would help her fine motor skills that were fun activities and not just practicing writing letters and scissor cutting (although we do that too). I thought maybe this might be helpful for someone else in my same position. I actually made a little fine motor activities bin that we work from and she just gets to pick activities from it and the best part is she gets excited about it and doesn't know she is 'working'. "

-Melty beads
-Metly beads template
-Paper to put over the melty beads that you iron on (ours came with our melty beads set)
-Iron

I knew this project was going to take some time and be just a bit harder for my daughter because of the fine motor skills required. (Just as an update, she is improving all the time, still is a bit weak in her fine motor skills, but all these activities and others have helped A LOT!)
I had bought some of these buffet trays from the dollar store to use for a couple different learning things we do, but they were also just perfect to use to pour our melty beads into to use more easily.
There is the great pincher grasp that I like to talk about being important for working on fine motor skills. See all those little pegs she had to put a bead on, that was a lot of pincher grasps. :)
What I loved was that it kept her interest until the very end of the project. It took her a full hour to place all those beads, but how great that she finished it and got all that fine motor in.
It looked too fun for me not to make one too, so here is mine.
Place paper protector over the beads. Iron (as directed).
 
Pull paper off and place on the opposite side and iron again.
They loved doing it. We had to make more a couple days later.
 
Our finished product!