Showing posts with label Spring. Show all posts

Wednesday, March 20, 2013

Spring Flowers

It's officially spring. As I'm sitting here it is a gloomy day with sprinkles. In some ways, a perfect representation of spring. It's not my favorite season, but I do love how variant it is. Pretty much anything goes for spring - hot, cold, snow, rain, windy, cloudy. . . you get what I'm saying. We had a LOT of snow this winter and as it melted away, I was amazed to see that despite all the heavy white stuff on them. my daffodils and tulips had pushed through the ground. I imagine it won't be too much longer before the buds appear.
Leaves returning, blossoms on the trees and flowers all around are some of my favorite parts of spring. So, as I was sitting down with with my son, working out of Ed Emberley's Picture Pie book at his request, I decided I must make flowers.
The book is full of many ideas, but you can easily use your own creativity. I keep a bin of colorful paper scraps - left over scrapbook paper, the fronts of thank you, birthday, etc. cards, and so on. It is very handy for a project like this. When we got he book I went out and purchased a circle punch. I want to say it is an inch or maybe 1.25 inches. 
 It needs to be enough that you can cut the circles in to eighths and have the pieces still big enough to work with. Of course, you can always just cut the circles out with scissors. 
 One thing I like that this has taught my 6 year old a few fractions. All the ideas in the book use these 4 shapes. For the spring flowers, we'll just use the 1/8 piece.
 First I filled the bottom of the paper with various greens for some grass. I found it easiest to just put short lines of glue on the background paper instead of each individual triangle.
 Then I randomly put green triangles scattered around the rest of the page. For the petals you can do 3 or 4. I think they look better a little tucked under the green, but clearly you can do it however you like.
 Lastly, add some stems.
This picture makes me happy.
And if you aren't into flowers, there are certainly other options.
 My son started with a bird and a fish. 
 Then he did a pair of these along with another fish.
The options are endless.
Get yourself cutting and gluing!

Saturday, July 28, 2012

Bird Nest Helpers

This is a post that relates more to late spring than the middle of the summer, but I couldn't really tell you how it worked out for us until now...sort of anyway. I saw two ideas for putting out yarn for bird nests. They were both the same basic principle - put yarn out. This one on Fiber Farm just used a suet holder and the one that looked more fun to me from Family Fun used an old onion bag.
Well, since we put out our feeder that the boys made with my dad (it was on our list for last summer of things to do and we got it done during the winter), we have had more birds at our house. I figured it would be a fun thing to at least try and help them with nest building supplies. But I waited. And waited more and after seeing a broken eggshell while walking my son to school last spring, I figured we were too late.
And then into May I saw a bird with a beak full of stuff, I decided maybe not. I asked my dad if I still had time and he said yes. I count his as an expert on all things bird because, well, he is. He taught avian ecology for 30+ years at Iowa State University, so I'm going to trust what he says. So, I decided we should jump right in on the project. I got a bag of yarn pieces from the thrift store and since my onion bag I was saving got tossed, we made do with a Mandarin orange bag.
I enlisted some help from my boys. The suggestion from my dad was to cut the yarn about 4 inches long or shorter. He also advised several time to just use different kinds of string, not yarn. (I didn't take his advice, though maybe should have, because the whole point of the original posts was to see your yarn pieces in nests all over the neighborhood. Ha ha.) Anyway, cutting yarn got boring, apparently, so I finished that up with our grass got shorter.
Then I cut the orange bag up into the biggest sections I could without having the label still attached. Clearly if you have older kids they could totally do this.
 
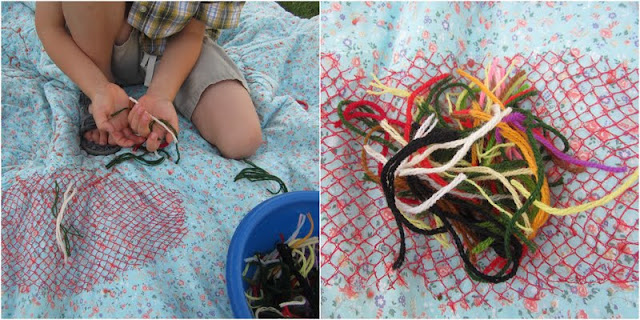
And here's our lovely bowl full of yarn pieces.
My helper came bag and we filled the center of the netting with a variety of colors of yarn.
Then I tied them.

And hung them in our tree. This is where my dad had more advice that I learned later. We made an extra bag to take camping with us and while there he said that the birds really need to be able to stand on something when trying to get the yarn out. 
So, my tree dangling wasn't so good, but hanging it on a spot where other branches were near was more ideal.
Since we also have a suet holder on our bird feeder, I filled that with yarn too. (Not with the suet in it. The first picture is from earlier in the year.) From what I could tell based on yarn pieces on the ground, this one actually got used, whereas the fun one to made did not. Maybe that was because of my hanging location, not my skills. :)
Whether or not she used our supplies we put out, this mama bird did build a nest in our tree and since then at least 3 baby robins have hatched. 
I think we are going to try this again next spring and instead of worrying about our pretty colors around the neighborhood, I'm going to take the professor's advice and use different kinds of string and other building supplies (which it turns out when I re-look, that is what they did at the Family Fun version) and make sure there is something the bird can hold onto while extracting the string from our bag.

Tuesday, April 10, 2012

Dandelion Jewelry

 
It is starting to become dandelion season at our house. My girls are constantly picking the dandelions. My mom (technically "our" mom since she is the mom of all the current contributors to this blog) is a creative genius. She is one of those people that sees something she likes in the store and then just creates her own pattern to make it at home.  Anyway, she happened to be at my house while my kids were picking dandelions. So my mom decided to help them make a dandelion necklace and bracelet. This brought back memories because my mom did this for us when we were just little kids. 
 Here I am at age two when my mom made me a dandelion crown.
 This is Collette and I. Looks like she opted for the necklace.
 
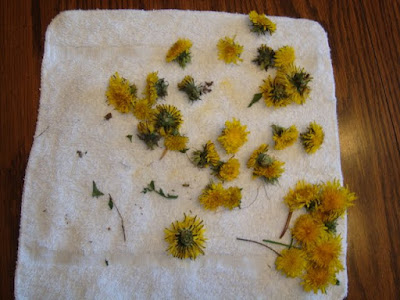
So my girls and mom picked a bunch of dandelions. You only really need the head of the flower.
My mom threaded a needle and the girls began to thread the dandelions onto the string just making the thread go through the base of the flower head. (Great fine motor practice for my daughter.)
  
 
Once they threaded a full strings worth then my mom helped them tie the two ends of the string into a knot.
 Ta-Da!!! A dandelion bracelet!
One of my daughters made two bracelets and the other opted for a necklace and bracelet. They thought it was GREAT!!!!!

Thursday, April 5, 2012

Easterize Your Watermelon

 
 I love watermelon and have been getting excited that real watermelon season is just about upon us. We got anxious the other day and bought some mini watermelons from Costco and decided to try this idea I saw on Pinterest that came from this blog: http://beneaththerowantree.blogspot.com/2011/07/playdate-link-party-blog-hop-15-all.html
 They made it super cute and incorporated the idea in a full fruit salad, but we were just eating lunch and doing this quickly.
 Slice some watermelon
 Use any cookie cutter to make fun watermelon shapes
 Since Easter is in a few days, we used bunnies, but you could use anything.
 It added an element of fun to our lunch and is something easy they can help with. We will definitely be doing this more considering how easy and fun it is to have little fun watermelon shapes with our meal.

Thursday, March 15, 2012

Soda Bottle Art

It is finally start to feel like Spring around these parts.  
So the kids and I attempted making some Spring Blossoms with Soda Bottles.  

I had seen the idea here and thought we'd give it a try.


Supplies:
Empty 2 litter bottles
paint and brushes
poster board
paper plates

We first started making the branches for our flowers to go on. 
I loved seeing the different variations of this from the kids...
Then it was time to create colors.  I bought just the primary colors of Red, Yellow, and Blue so the kids could learn what makes purple or orange or green.  
This was a fun part for them as they created just the exact shade they wanted.
 Then we dipped the bottom of the pop bottles in the paint and created some fun spring blossoms.
 The thicker the paint - the larger the blossoms.
We would wash off the bottom of the soda bottle when we wanted to change colors.
It was a fun Spring Fever craft for the kids.