Showing posts with label Paper craft. Show all posts

Wednesday, November 26, 2014

Wow and Happy Thanksgiving.

Um, hi, hello. I know we have been absent. I know we (mostly me) keep saying we'll post this or that and then silence for months. But people are visiting! Thank you. More than 100 people a day are here visiting our site and I am just so surprised! 
 I know Thanksgiving is tomorrow, so there is not a lot of time to create before the big day, but when your tummies are full or while waiting to eat, here are a few things we've done in my preschool class (follow me on Instagram if you like).
 It all started with the mayflower. This one is quick and requires little, plus there is the fun memento of your kiddo's little hand forever printed on the page. We just used half a sheet of light blue construction paper, had the kids draw on white clouds and blue water (or whatever they wanted, which DID include Elsa!) Then paint one hand brown and plop it on the paper for your boast and masts. Then glue on little white squares for sails. I think I originally saw this in Family Fun magazine. I will go back and check.
 The turkey gets a lot of play this time of year, however I am pretty certain he never looks like this when I'm about to chow at Thanksgiving dinner. Another simple project. Cut a cheap paper plate in half, glue a peanut  shaped (or whatever shape you want your turkey body to be) piece of brown paper to it. If you just draw the shape, the little ones can cut it our themselves. Draw in features (or use other materials - orange paper for a beak, googly eyes, even yarn for that red thing by their beaks). the next part can be done with construction paper, but I think it looks best with tissue paper. Voila! Turkey!
 We talked in class about how the Wampanoag Indians helped the pilgrims and taught them about corn. The kids explored the kernels, removed them from the cob, and we also compared field corn to popcorn. Then I air popped a batch of popcorn. 
I was able to use Indian Corn last year which added in a fun dimension and I even popped it in the microwave to show that even corn on the cob can pop!
We used both the popped corn and the field corn kernels (popcorn kernels would clearly work too) to create out own harvested corn. I just eyeballed the shapes for the cob and the husks and let them glue everything on however they thought it best.
 This one is pretty standard this time of year. You can add on some feet, a beak, eyes and all that fun stuff to make it even more fancy.
 I'll have to look up where I got this idea too, but it is a turkey handshake. First we just started with making it on our own hands before trying to make one with a friend. The open hand is the feathers and the "thumbs up" on its side is the body and head. the kids like this a lot.
 I always love a little bit on Montessori style work in my classroom. This is not just a simple transferring activity. It also can be an introduction to how cranberries are harvested and show that they float (maybe a little sink or float question before filling the bowl up?). There are 3 different utensils I put out for them to transfer with - all bought at the thrift store. The spoon is slotted so the water doesn't really transfer along.
This can also just be done with a bowl and any sort of sectioned off container, like an ice cube tray, using the fingers to transfer. This is also good as a sensory activity.
The last one I have for today is this story telling bracelet and poem from Dr. Jean. It's a good way for the kids to have a visual way to remember how the first Thanksgiving came to be.
Have a wonderful Thanksgiving and thank you so much for visiting our blog.

Friday, December 6, 2013

Paper Strip Tree

 This post is a project we did last year around Christmas time. It's great for any age. My kids ranged between 2.5 and almost 7.
 When I saw this idea on Whatever... I thought it would be a great way to use a lot of Christmas scrap paper I had left over from another project.
Supplies - lots of patterned green paper, scissors, glue stick, and if you want to save some time, a paper cutter.
I cut out the paper in various widths. I cut those strips into various lengths (something a child could also very easily do). Once we had a pile ready to go, I let everyone chose a background paper.
From there is is just gluing. It might be helpful to lay out the tree before gluing, but winging it is sometimes more fun. Either way will obviously work.
It's meant to go from longest strip at the bottom to shortest strip at the top to look like an evergreen.
We are not picky about that and figure the kiddos should just do what they can. Just gluing down the strips is good work for those cute little hands.
And my little artist had a tree set up to glue, but changed his mind and decided to make his into a shark instead. The point is to create and that he did!
The three individual creations side by side.
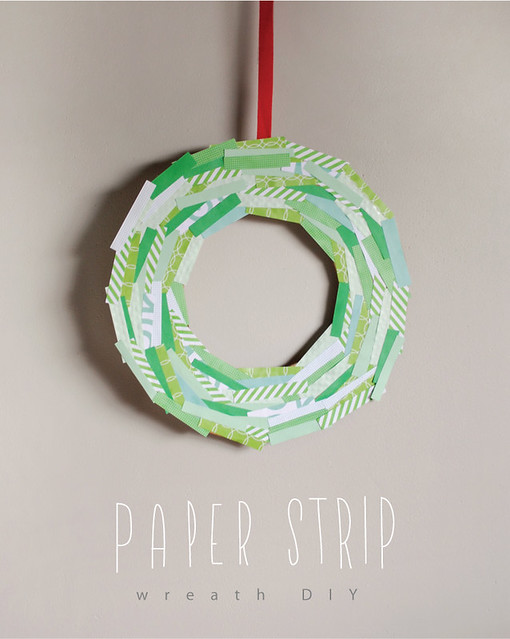
I still have papers left over, so maybe this year we will make a wreath like this one featured on Mer Mag. 

Wednesday, March 20, 2013

Spring Flowers

It's officially spring. As I'm sitting here it is a gloomy day with sprinkles. In some ways, a perfect representation of spring. It's not my favorite season, but I do love how variant it is. Pretty much anything goes for spring - hot, cold, snow, rain, windy, cloudy. . . you get what I'm saying. We had a LOT of snow this winter and as it melted away, I was amazed to see that despite all the heavy white stuff on them. my daffodils and tulips had pushed through the ground. I imagine it won't be too much longer before the buds appear.
Leaves returning, blossoms on the trees and flowers all around are some of my favorite parts of spring. So, as I was sitting down with with my son, working out of Ed Emberley's Picture Pie book at his request, I decided I must make flowers.
The book is full of many ideas, but you can easily use your own creativity. I keep a bin of colorful paper scraps - left over scrapbook paper, the fronts of thank you, birthday, etc. cards, and so on. It is very handy for a project like this. When we got he book I went out and purchased a circle punch. I want to say it is an inch or maybe 1.25 inches. 
 It needs to be enough that you can cut the circles in to eighths and have the pieces still big enough to work with. Of course, you can always just cut the circles out with scissors. 
 One thing I like that this has taught my 6 year old a few fractions. All the ideas in the book use these 4 shapes. For the spring flowers, we'll just use the 1/8 piece.
 First I filled the bottom of the paper with various greens for some grass. I found it easiest to just put short lines of glue on the background paper instead of each individual triangle.
 Then I randomly put green triangles scattered around the rest of the page. For the petals you can do 3 or 4. I think they look better a little tucked under the green, but clearly you can do it however you like.
 Lastly, add some stems.
This picture makes me happy.
And if you aren't into flowers, there are certainly other options.
 My son started with a bird and a fish. 
 Then he did a pair of these along with another fish.
The options are endless.
Get yourself cutting and gluing!

Thursday, February 7, 2013

Year of the Snake

Last year for Chinese New Year we made lanterns and dragon masks. Well, it's about time for the dragon to move on over for the snake. Sunday the 10th is Chinese New Year and the snake will reign through next January.
This project was modeled after one I did sometime around second grade. I remember that I loved making it and it actually was hanging up in my room even when I was in high school. Thinking that if I loved the project so much that my boys, one of them a huge animal lover, would be all over this. With the "Year of the Snake" coming up, I decided the timing was perfect.
Very basic supplies that you probably have sitting around already. Markers also work well (unless you pick the dried out ones like I did!). The paper plate will need to be the very basic cheap-o ones.
Using the indented circle as a template, cut out the head. When starting on the outer edge of the plate, make sure you cut at an angle, as one end will be the tail.
Either pre-fold the circle in half or just keep it flat and fold later and fill in the mouth.
On the other side give the snake some eyes and nose dots then fold in half. The head is ready to go.
Next up is the body. The bumpiness of the plate is a little hard to color on, so you can just smash it down before you start.
 You can look up various patterns snakes often have to decorate it or just wing it like we did.
 Fold up one end of the outer ring and staple to the head.
 Your snake will look something like the one on the right. You can roll it up to help it curl better.
 The longer they hang the more elongated the body will be.
The project was even more loved than I could have guessed. My animal lover asked both yesterday and today if he could make more, in addition to the two he did on his own and the one we tag teamed on. They are easy and very kid friendly to make. Options are endless.

Thursday, September 20, 2012

Going on a (Paper) Picnic

  Sometimes it is fun to make a special date for a stuffed animal. Even if they can't really eat, why not take them on a picnic? I saw this idea for "flat food," (as they called it) in the book The 2,000 Best Games and Activities.  
 They suggest cutting out food and give some ideas of what you can do once you have them glued down. We opted to make a date with the boys' favorite stuffed animals and go to the park and have a (paper) picnic.
It's really simple. Just find some old magazine with pictures of food in them. A magazine with recipes might be good, but even just simple ads are also a great resource. A little glue, paper plates and scissors, and you are all set!
The kiddos looked through some magazines for food that they thought their animals might like, or maybe they just thought they looked good! They worked their scissor skills as they cut the pictures out.
Next up was arranging them on the plates and gluing them down.
Once they are dry, grab your stuffed friends, head to a park or backyard or even just the living room. 
Then let them enjoy! (It is probably a little more fun if the kids have something real to eat too.)
My boys have liked doing special things for/with their stuffed animals. One of them apparently was having his birthday last week, so the kids asked if we would sing "Happy Birthday" to the animal. 
One of our local libraries also has a fun thing they do in the summer where the kids can drop off their animals for a sleepover. When we pick them up in the morning, there is a video of all the silly things they did all night away from the humans. (In fact, if you are curious, you can watch the video HERE. The kids LOVED it!) Stuffed animals can sometimes be an extension of a child and at least in our house, I feel like it is important to treat them nicely. These two - Peng and Bun are often doing things that are far naughtier than my kids will do, but somehow being able to have their animals be that way helps them. I'm no pro about this, just stuff I have noticed. Anyway, try out the picnic. Any time of year will work depending on where they take their little plates of food.