One afternoon, this is what my sink looked like - full of containers I was saving for these Garbage Goodies projects we've been working on. I cleaned all the bottles and containers.
Then when the sticky stuff still wasn't coming off of some of the plastic, I used the peanut butter trick. (Spread a thin layer of peanut butter on the spots that stay sticky after you remove a label, let it sit then scrape off.) I was set to go on making my own shrinky dinks until I re-read over how to make them and realized my plastic wasn't the right kind! Way to pay attention genius! I though I just needed strawberry, etc. containers, but, wrong. I needed #6 plastic containers. Ugh.
Lucky for me when we went out for our mid-week family lunch date with my husband at Chick-fil-A, I noticed out kids were #6! Hooray! They saved cows and my project. (And my other plastic containers didn't totally go to waste, as you will see later this week.)
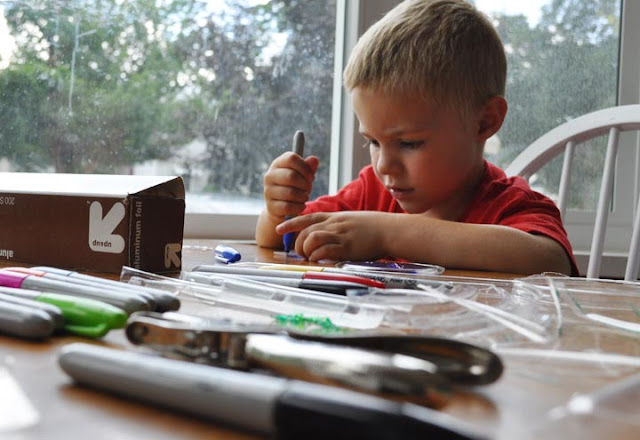
Now on to the project. I used a few sources (Poopscape Projects, Show Tell Share, and Skip to My Lou), but mostly Curbly. Some of the direction are different in each of them as far as temperature goes, but all of them say you must use #6 plastic (and #6 Styrofoam also works). Gather your supplies. (You can use colored pencils instead of markers, so long as you sand one side of the plastic to roughen the surface of it before drawing on it.)
My boys scribbled, made patterns and drew pictures on their plastic.
We used the lids first. On one of them my son insisted that we not cut any bumpy edges off, so i didn't.
It came out flat, as if there were never edges. I will not though (and it is exaggerated here because he filled in the words) that if you do have words or anything like that on the plastic you are working with, you will still be able to see the texture of it in the final product.
So, let me back up and give you instructions. You can cut your plastic out in any shape and if you are going to want a hole in it, use a hole punch before it goes in the oven.
You'll notice that the edges are rough on this, but once it shrunk it didn't seem to matter. You can make yours prettier though. I won't be offended. :)
For the "baking" part there is variation (see links above) I chose to use the aluminum foil method. Place your prepared plastic pieces on a piece of foil (I folded up the sides so there was a taller edge) and put in a 350 degree oven on the lowest rack. I checked on mine after about 90 seconds, but it took around 3 minutes to really shrink up.
Not the prettiest picture, but here is one in the oven. If you'll notice there is a big circle drawn on the foil. This was the original size. The plastic will shrink to about 1/3 of its original size. This is a fun part for the kids to see. 

See that tiny guy? So cute. My boys loved how they got so small, but thicker.
So, I was sad to discover that my biggest lid must have not been #6 plastic (or else I just started messing up somehow). When I put these pieces in the oven, they never shrunk and just spread out, getting thinner and more brittle.
This is one we will repeat again once I get more plastic or Styrofoam because everyone (myself included) had a lot of fun.
Anytime you do stuff like this, be smart - oven are hot and not a place kids should be hanging out. You should open a window or something because it can get a little stinky. Have fun!


No comments:
Post a Comment